
Illustration by Cash Macanaya
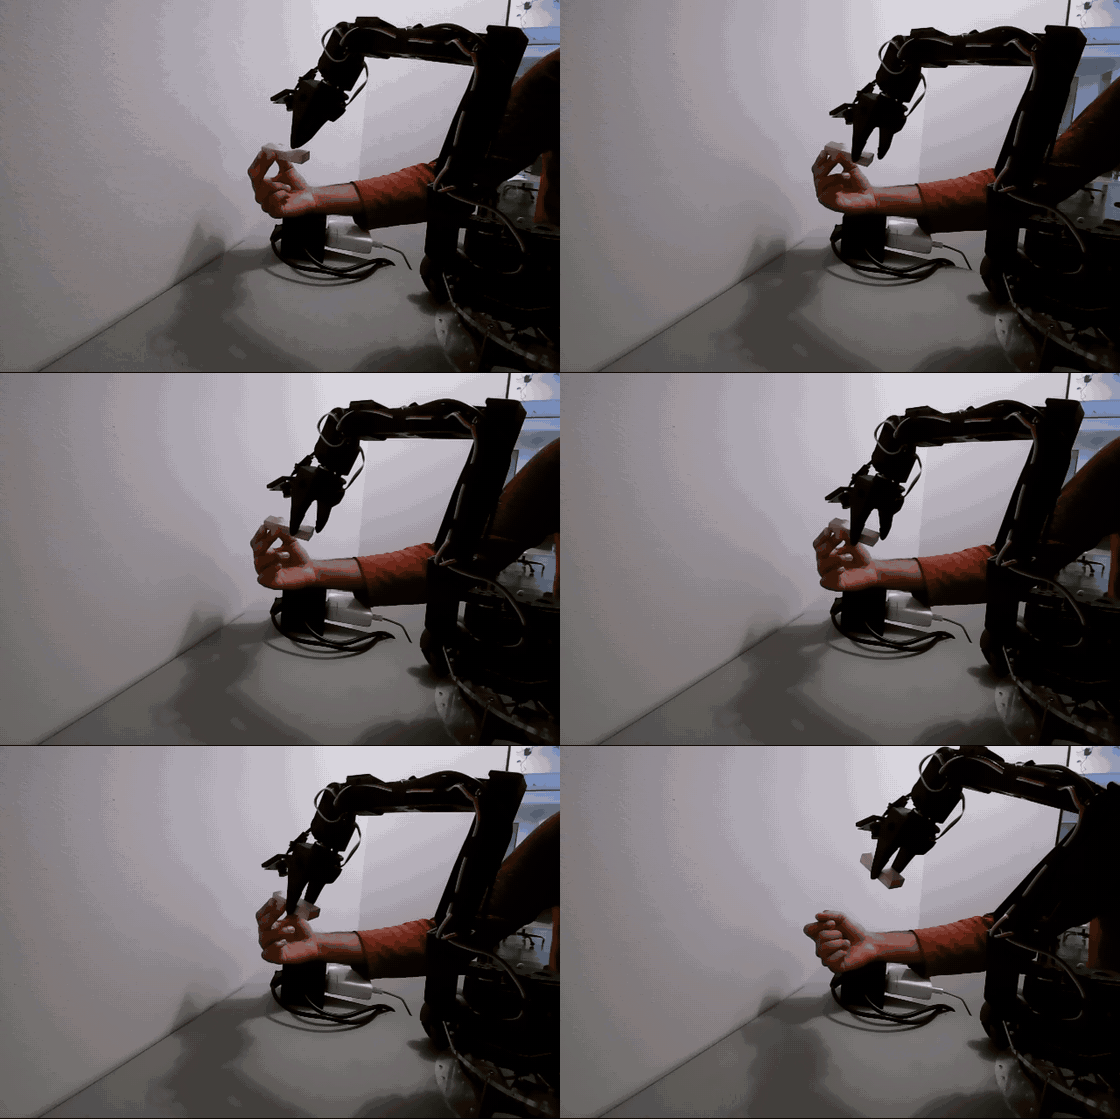
This guide presents how to use lerobot's robot arm with RunPod to run the MolmoAct2 zero-shot vision language action model
I have chosen MolmoAct2 in particular, as it works zero-shot without any fine tuning.
This guide assumes that you have an SO101 robot arm setup - with a side camera, and a wrist camera for the robot arms. To aid on this form of setup – you may consult the lerobot documentation
1. Basic setup (IMPORTANT!)
First add some credit from the RunPod billing page, at console.runpod.io/user/billing
Then go to the deploy page, at console.runpod.io/deploy and go ahead and deploy a pod with the details as given below
The GPU I am using is the RTX PRO 6000, so select the pod
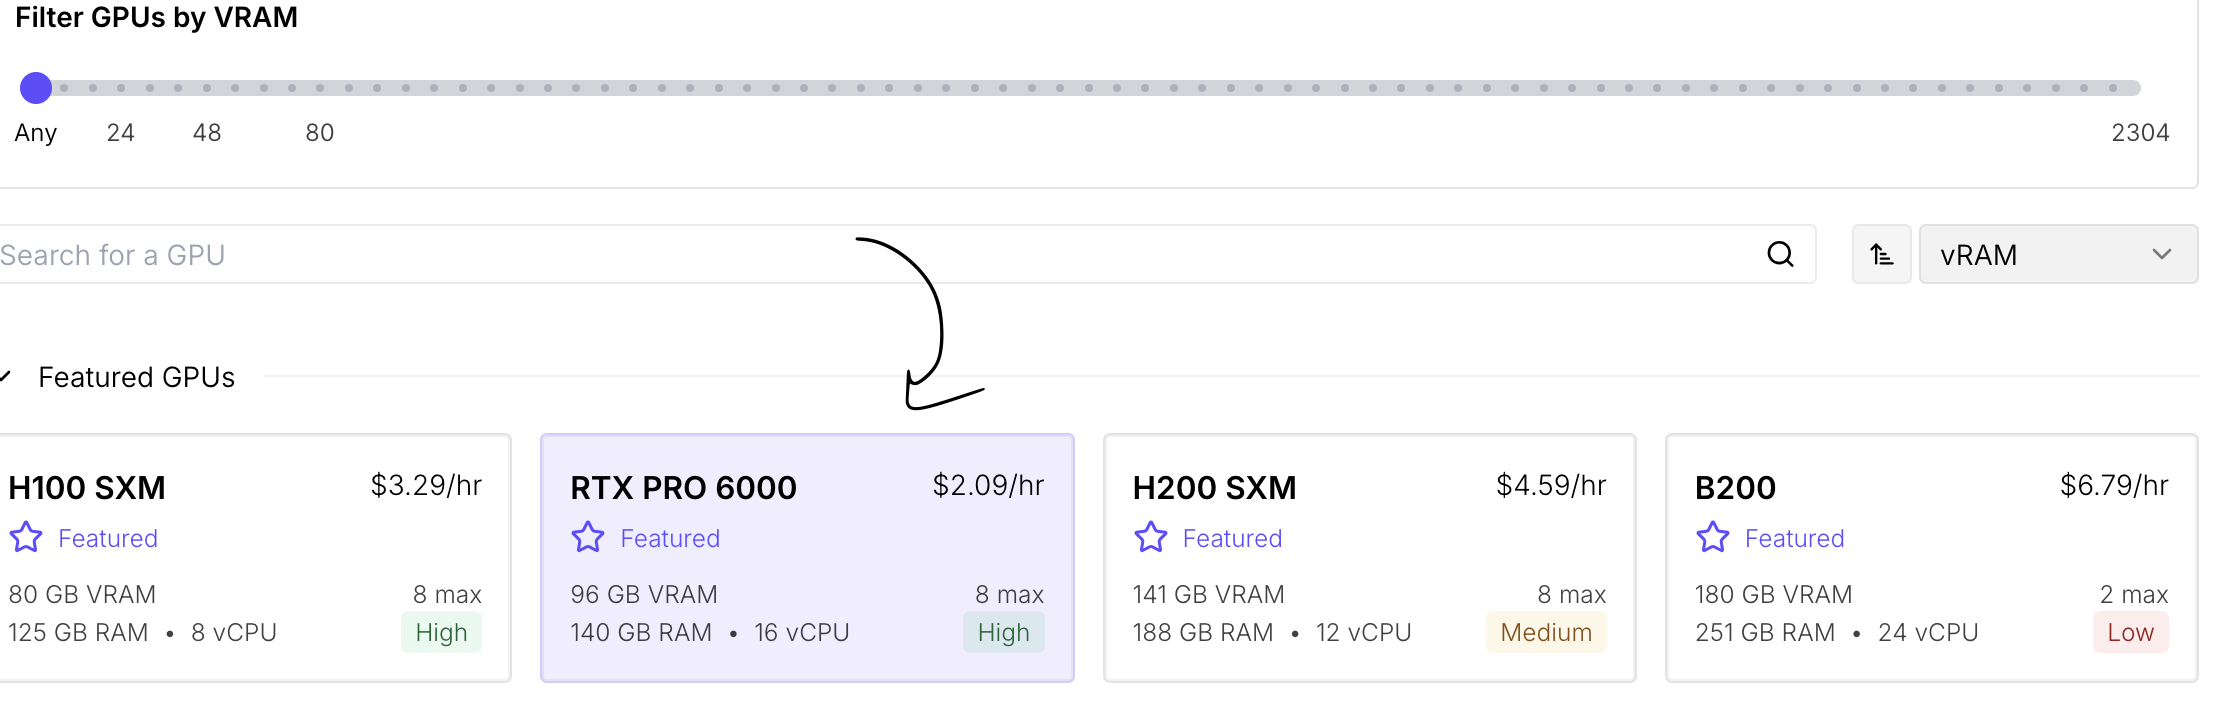
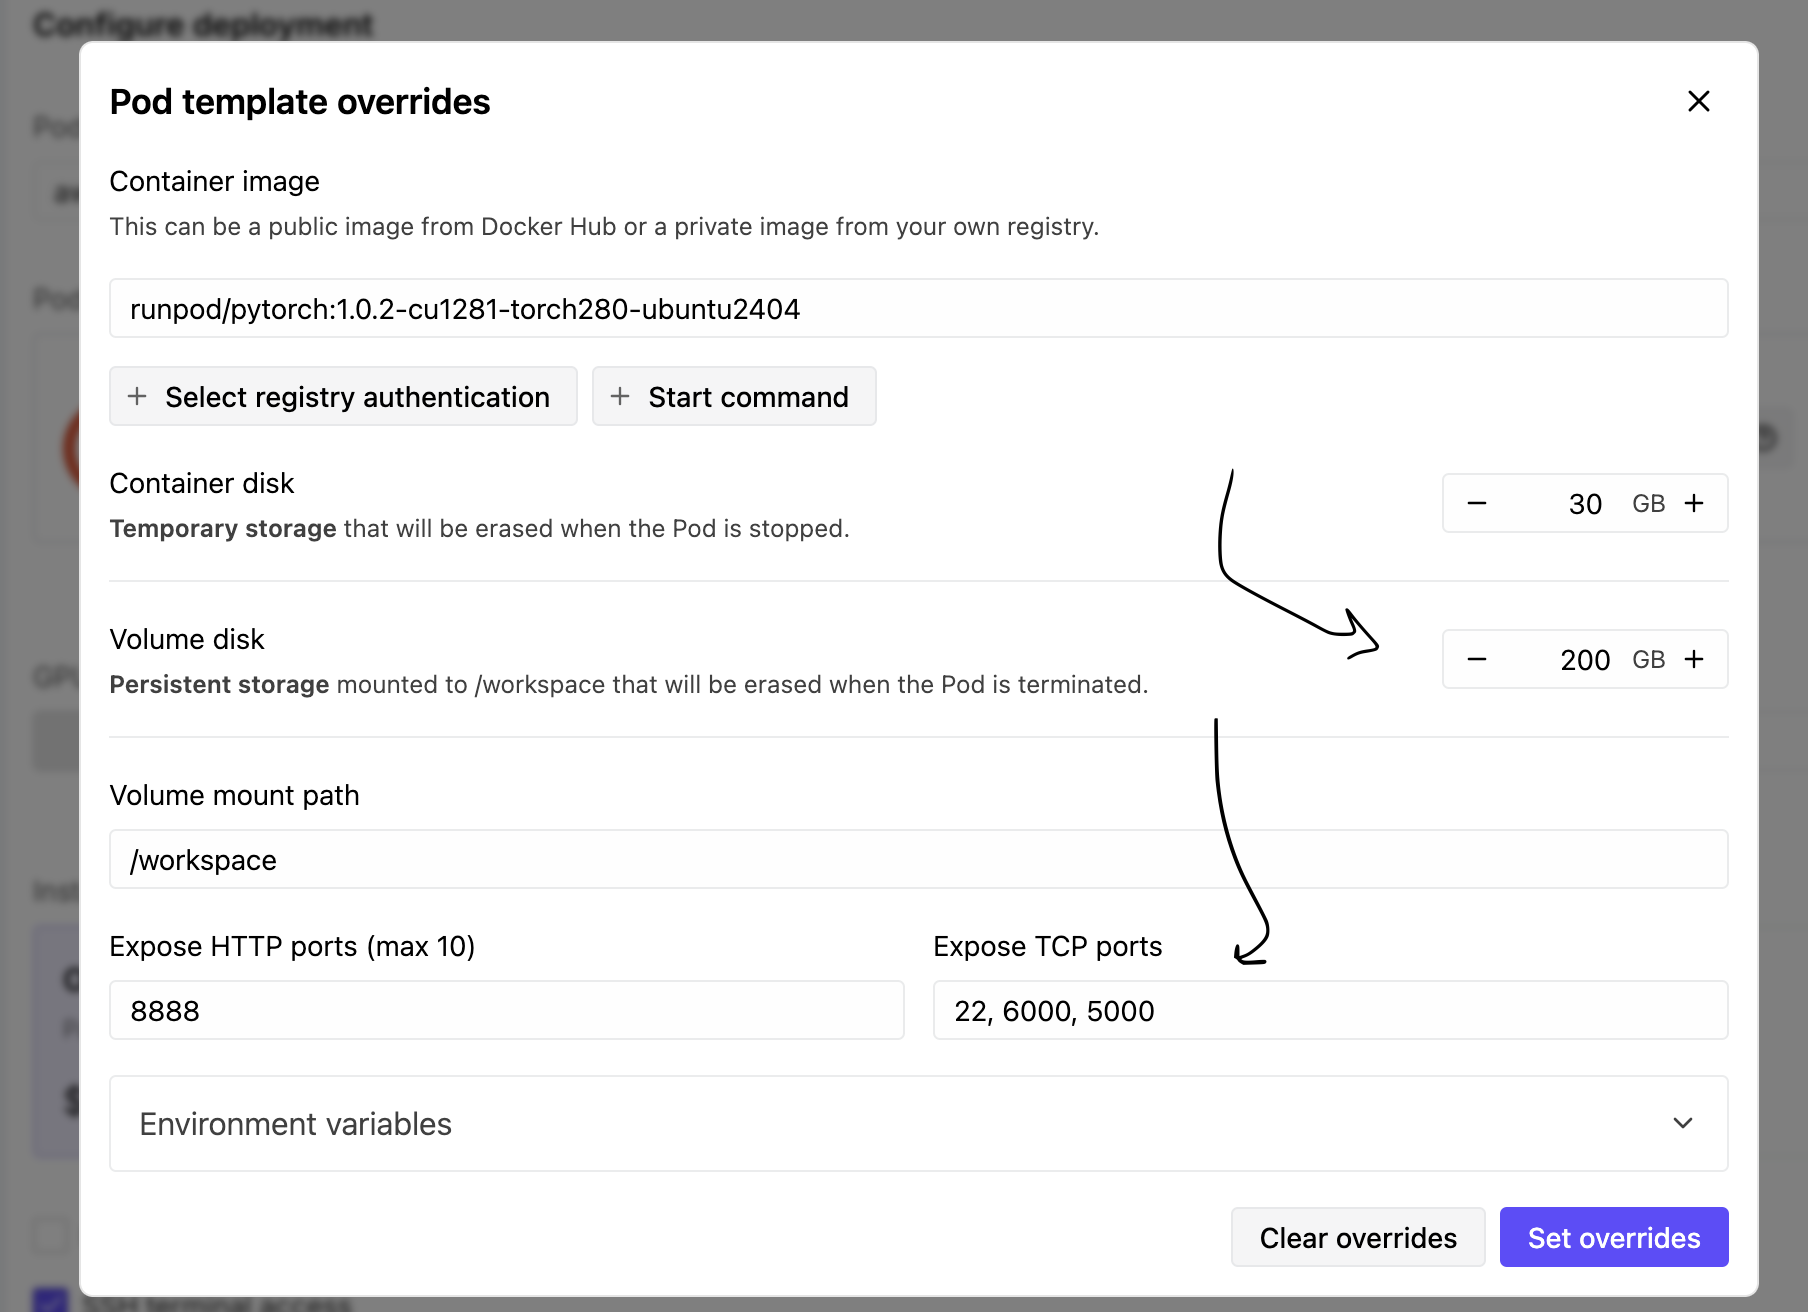
before deploying it, be sure to open up appropriate ports, as shown below
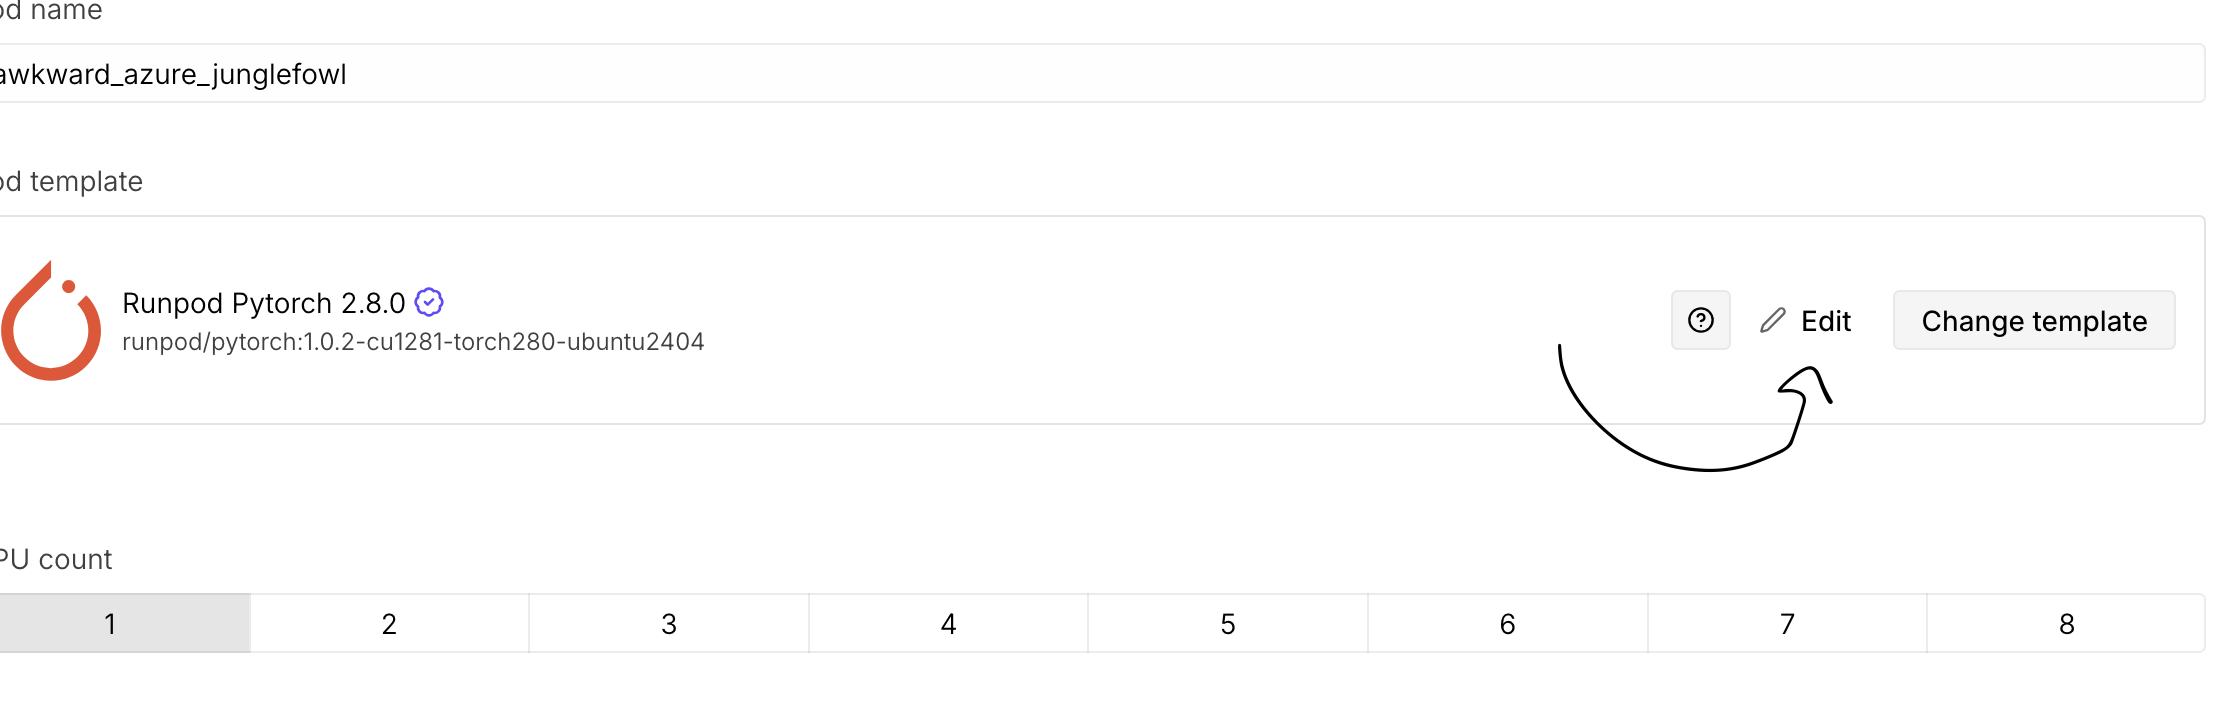
Set "Expose TCP ports" to 22, 6000, 5000 and set the volume storage to 200gb, as shown in the image below, this is a little more than what we require, but better safe than sorry, and finally click on "set overrides" to confirm the changes.
(Note : We only use port 5000 here, the rest of the ports are optional to be set, I like to set port 22 to allow for SSH connectivity and 6000 as a backup port, in case 5000 does not work)
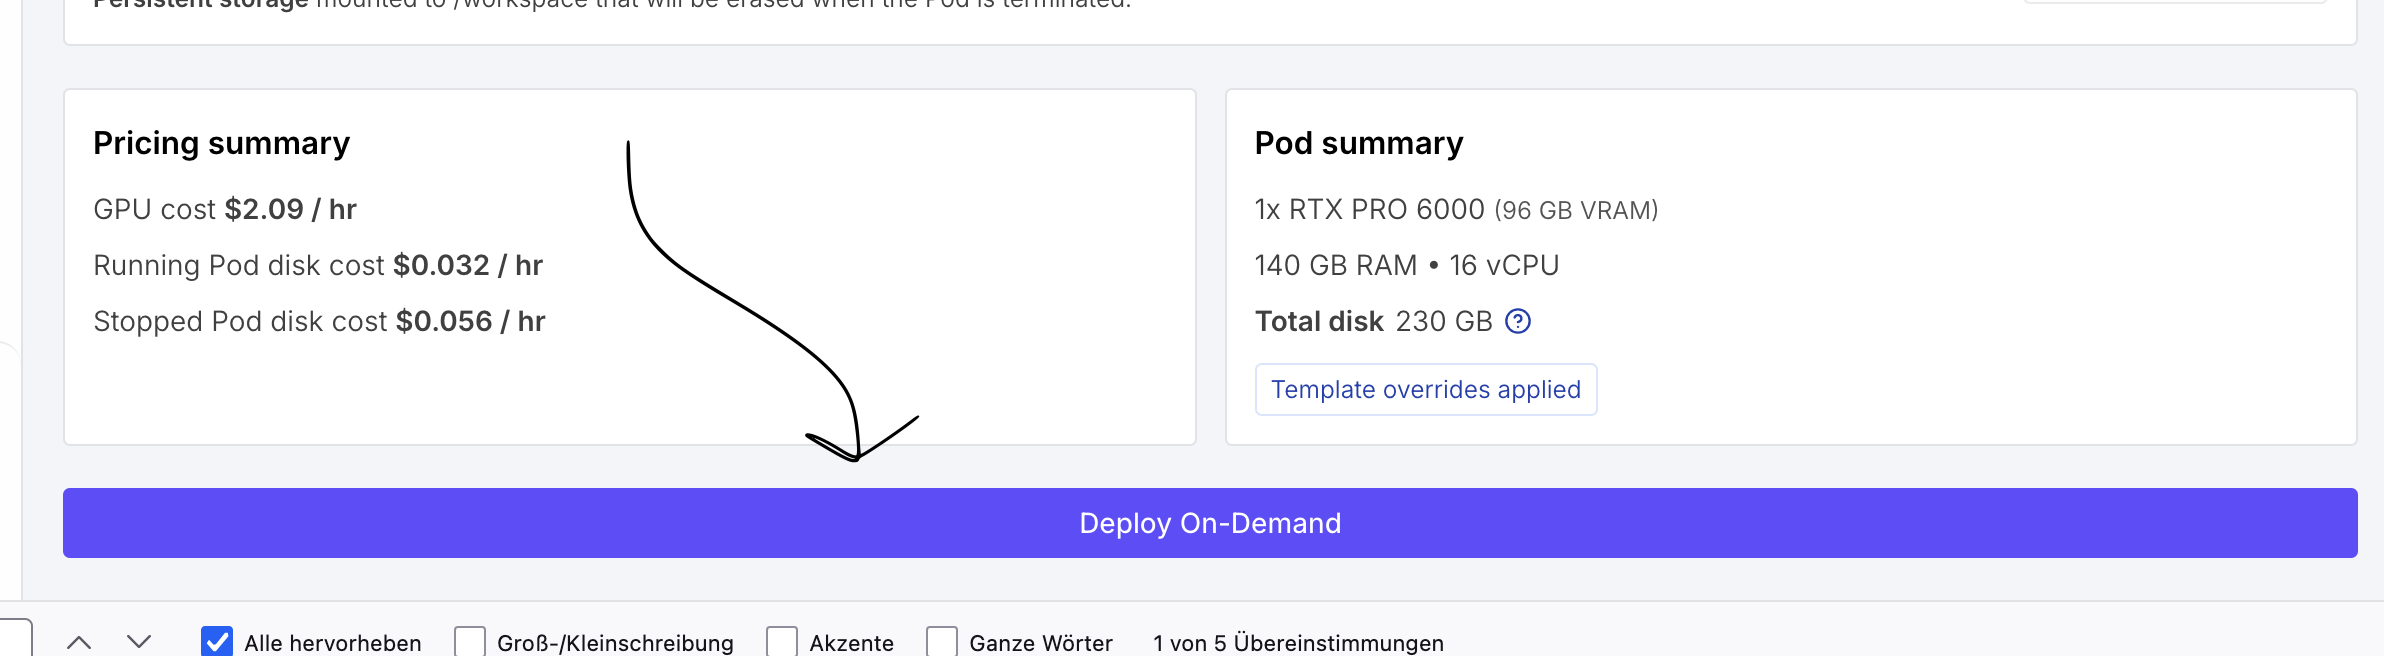
and now go ahead and deploy it
2. Pod deployment
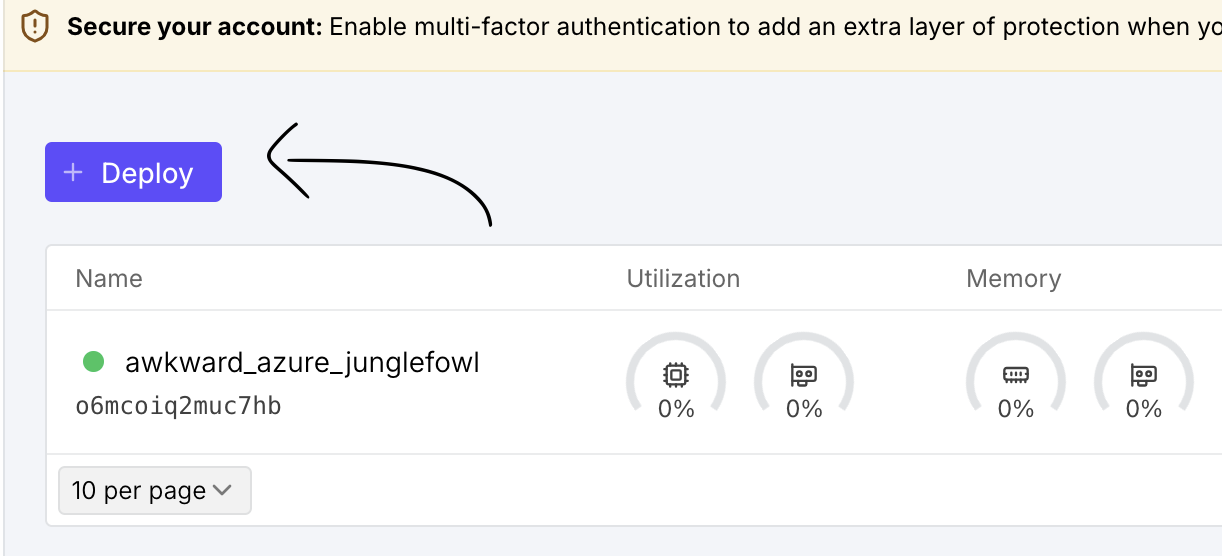
now, after deployment click on your pod
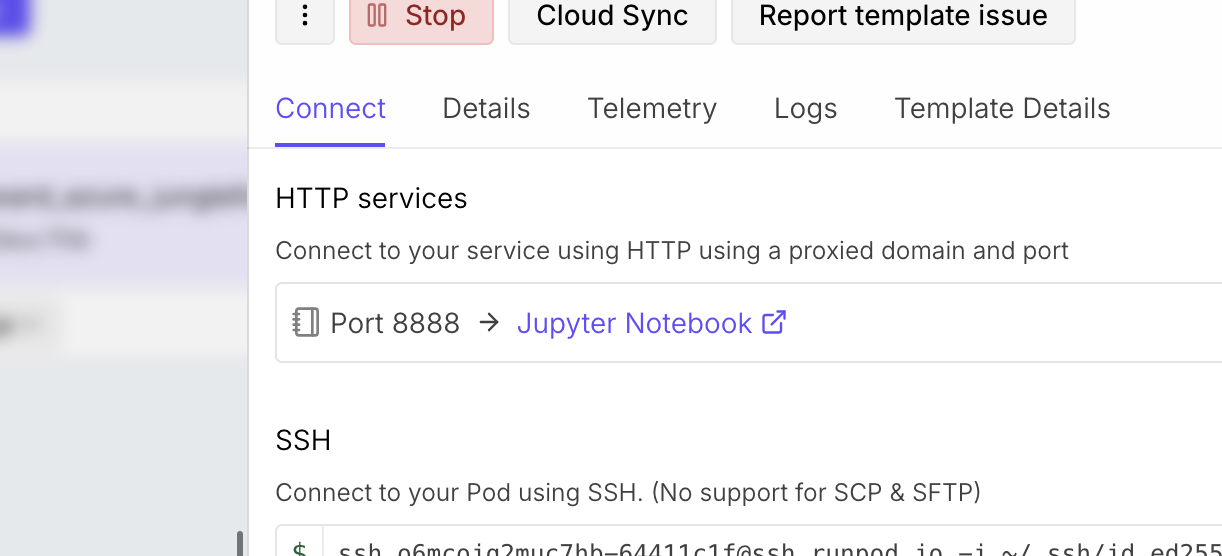
and open the jupyter notebook (click on the url to open the notebook)
3. Initial terminal setup
Then, here, start a terminal
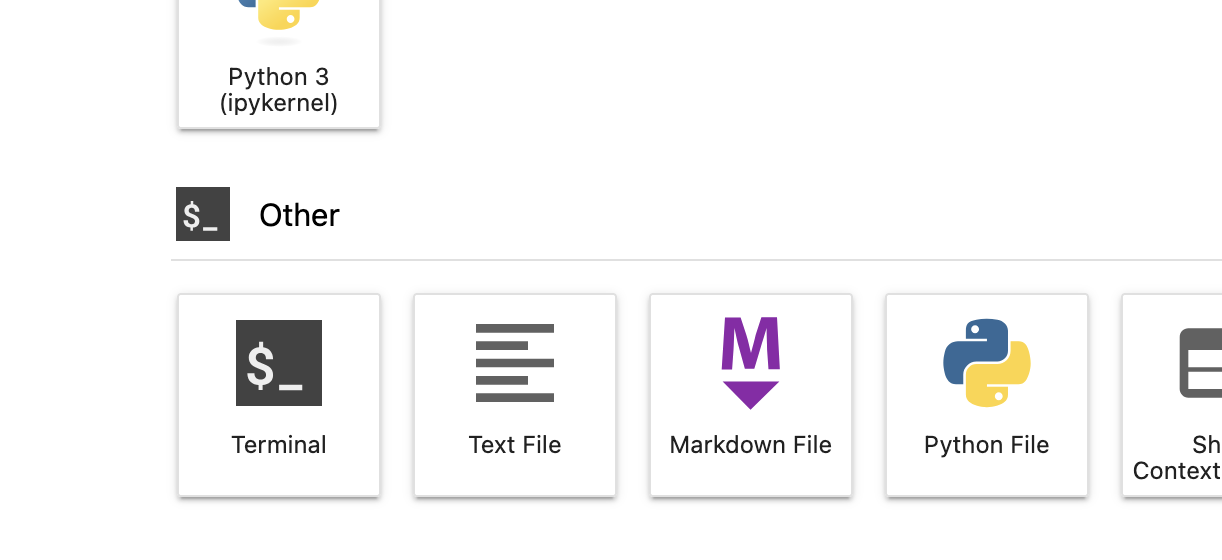
In order to avoid issues later in the terminal, run the following lines
This ensures that the correct uv project location is being used, even if you open up a new jupyter shell
further, we store the virtual environment in the /workspace path, to avoid any data being lost upon pod restart.
# 1. persists UV_PROJECT_ENVIRONMENT for all interactive shellscat > /workspace/env.sh <<'EOF'export UV_PROJECT_ENVIRONMENT=/workspace/venvEOF# 2. hook it into future shells (idempotent — safe to re-run)grep -qxF '[ -f /workspace/env.sh ] && source /workspace/env.sh' ~/.bashrc \ || echo '[ -f /workspace/env.sh ] && source /workspace/env.sh' >> ~/.bashrc# 3. apply to this sessionsource /workspace/env.sh# 4. create the venv only if missing[ -d "$UV_PROJECT_ENVIRONMENT" ] || uv venv "$UV_PROJECT_ENVIRONMENT"# 5. confirmecho "UV_PROJECT_ENVIRONMENT=$UV_PROJECT_ENVIRONMENT"ls "$UV_PROJECT_ENVIRONMENT/bin/python"4. MolmoAct2 server setup (RunPod side)
now in the same terminal, run the following code to set up and install lerobot 0.6.1
cd /workspacegit clone https://github.com/huggingface/lerobot.gitcd lerobotgit checkout 7e241bd630a3719a56157a497ce5d08f244784f1 # v0.6.1uv sync --extra molmoact2 --extra asyncNow we patch lerobot to actually support MolmoAct2 for inference, by running the command below in the terminal
cd /workspace/lerobotsed -i 's/"pi05", "groot"\]/"pi05", "groot", "molmoact2"]/' \ src/lerobot/async_inference/constants.pygrep -n SUPPORTED_POLICIES src/lerobot/async_inference/constants.pythe last bit with grep should output a SUPPORTED_POLICIES code line with "molmoact2" present in it, by default, lerobot does not support this to be enabled in the inference server, so we override their constraints to enable it. Nonetheless, I have asked the lerobot maintainers to put it in by default to avoid this patch.
And we download the huggingface checkpoint for MolmoAct2, by running the following line in the terminal
uv run hf download lerobot/MolmoAct2-SO100_101-LeRobotand finally we start the inference server
uv run python -m lerobot.async_inference.policy_server --host=0.0.0.0 --port=5000Note keep this server running until the robot arm starts to move
5. MolmoAct2 setup locally
Connect the robot to your local device, as described in the lerobot SO101 guide
Note: you probably don't need to set the motor IDs, and just need to calibrate the robot arm if you bought it
Note 2: Ensure you clone the repository locally (by opening a mac terminal) and running
git clone https://github.com/huggingface/lerobot.gitcd lerobotgit checkout 7e241bd630a3719a56157a497ce5d08f244784f1 # v0.6.1uv sync --extra feetechthen find the robot's serial port using lerobot-find-port
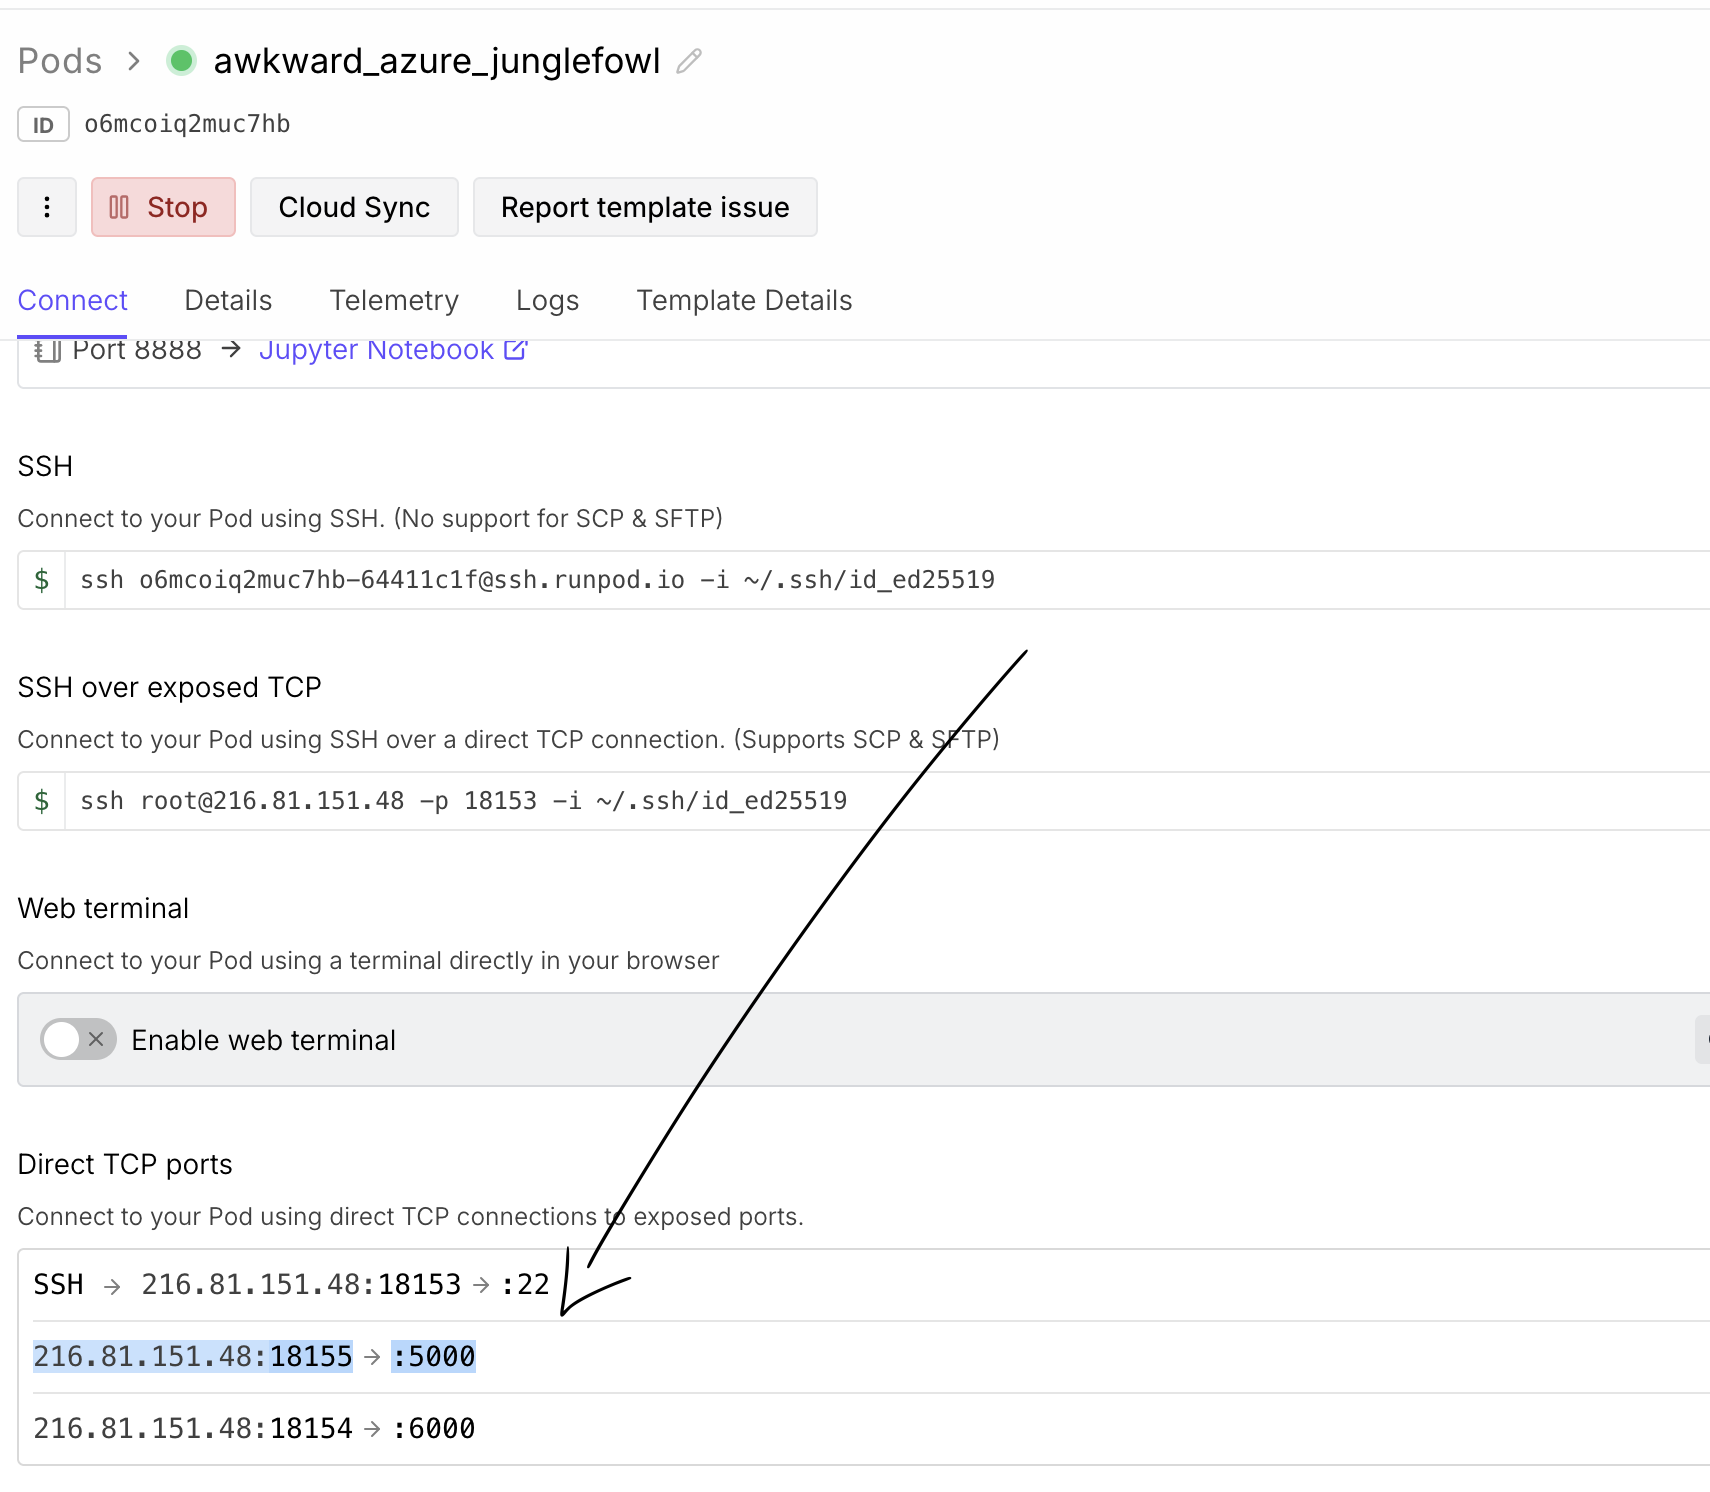
uv run lerobot-find-portnow go back to your RunPod pods page, and click on your pod again, go down and check the port mapped to port 5000
note the ip and port here (and store it as pod-port-5000-ip-and-port), this will be used in the next step
To understand the opencv ids for the cameras you are using, you may run the following command to get pictures from all your cameras, with the file names as their opencv ids
uv run python -c "import cv2for i in range(10): cap = cv2.VideoCapture(i) ok, frame = cap.read() if ok: cv2.imwrite(f'{i}.jpg', frame) cap.release()"this should produce images of the format 0.jpg, 1.jpg, 2.jpg, 3.jpg… - the number corresponding to your side camera is your side_cam_id, the number corresponding to the wrist camera is your wrist_cam_id
finally run inference using
uv run python -m lerobot.async_inference.robot_client \ --server_address="<pod-port-5000-ip-and-port>" \ --policy_type=molmoact2 \ --pretrained_name_or_path=lerobot/MolmoAct2-SO100_101-LeRobot \ --robot.type=so101_follower \ --robot.port="<port_id>" \ --robot.id="<your_robot_arm_id>" \ --robot.cameras='{ cam0: {type: opencv, index_or_path: <side_cam_id>, width: 640, height: 480, fps: 15}, cam1: {type: opencv, index_or_path: <wrist_cam_id>, width: 640, height: 480, fps: 15} }' \ --actions_per_chunk=50 \ --task="pick up the wooden cube"ensure you replace <your_robot_arm_id> for the name of your calibrated robot arm, <pod-port-5000-ip-and-port> with the ip and port we noted earlier, <port_id> with the serial port from lerobot-find-port
likewise, <side_cam_id> needs to be replaced with the id of your side camera, and <wrist_cam_id> needs to be replaced with the id of your wrist camera - cam0 is the primary/side view and cam1 is the secondary/wrist view, per the MolmoAct2-SO100_101-LeRobot camera convention
There is about a 5-10 minute wait period before the model is loaded into the GPU and the robot arm actually starts moving. This is due to the model being large, and is completely normal, so keep some patience after this step.
Finally, the robot should move!
Troubleshooting
In the event port 5000 fails for some reason, you can try the procedure again with port 6000. Ensure you start the policy server once more (at the end of section 4) with the port set as 6000. From then on in step 5, use the port ids for port 6000 instead of port 5000
The robot model is extremely slow, and needs some time between steps – this is normal, but with enough patience, it should be able to pick up the given block, however, it does need patience.
xoxo - appreciate you
Contents
Related
How many Penguins can TabPFN classify correctly?
Mon · Aug 17, 2026
Zero-shot use the SO101 with ArUco tags!
Mon · Jul 20, 2026
No don't google it, ask me about it
Sat · Jul 18, 2026
The collective ownership costs for LLMs - 2026 June
Sat · Jun 20, 2026

You're valuable, I'm valuable, the world is weird
Sun · Nov 2, 2025